You either love it or loathe it. Some people go all out in joyous celebration and others focus inwardly on the year that was, and on family and faith. For me, it usually is a time of increased stress, wanting to please everyone and having a difficult time not getting disappointed. I never felt at ease with Christmas as an adult, until I was a single parent, and while I am no longer single, I find myself once again with feelings of dread as the holiday season approaches. Will I miss someone? Will I not have enough time between working to finish the projects for the day, and then – there’s the dreaded spending of approximately 6 hours traveling to various family gatherings. Leaving home as most people are sitting down to open gifts and eating breakfast, and not returning again until well after the sun has set. By then, most people are settling in for the evening and relaxing, but for me it’s a full 1.5 hour journey back home, unpacking the car, and meandering inside to greet the dog, and feed her and make sure she’s all sorted before falling into bed and then using Boxing Day (ed: for non-europeans/British, Boxing day is the day after Christmas) to recover. THEN it’s back to work the following day! It’s definitely stressful, and I’m sure I wouldn’t be alone in the shared stress of the day. However, the pre-holiday crafting is the fun part for me.
My son recently visited his grandparents and came home with a boot full of loot! Treasure that us crafty people appreciate the most! Things that my Mum, in the winter years of her life, no longer wanted, and passed them along to me. Part of this heart warming treasure, were some Nancy Halvorsen’s Art to Heart books.
As I perused the pages, flipped through instructions, and devoured the beautiful photographs, my little mind went for a stroll by itself and came up with what else I could do with one of her designs. I wanted to showcase my hand dyed fabrics! A little spark ignited to a bush fire of epic proportions within my mind. I was GOING to make a small Christmas wall hanging! Never have I done something like it before, so – here we go!
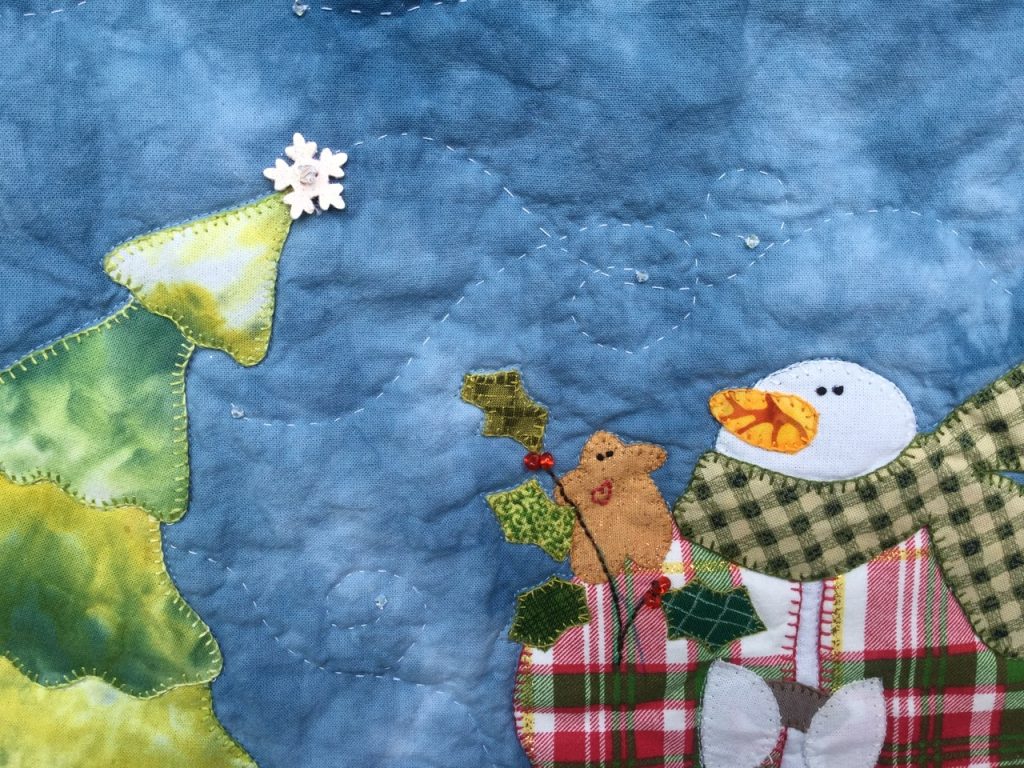
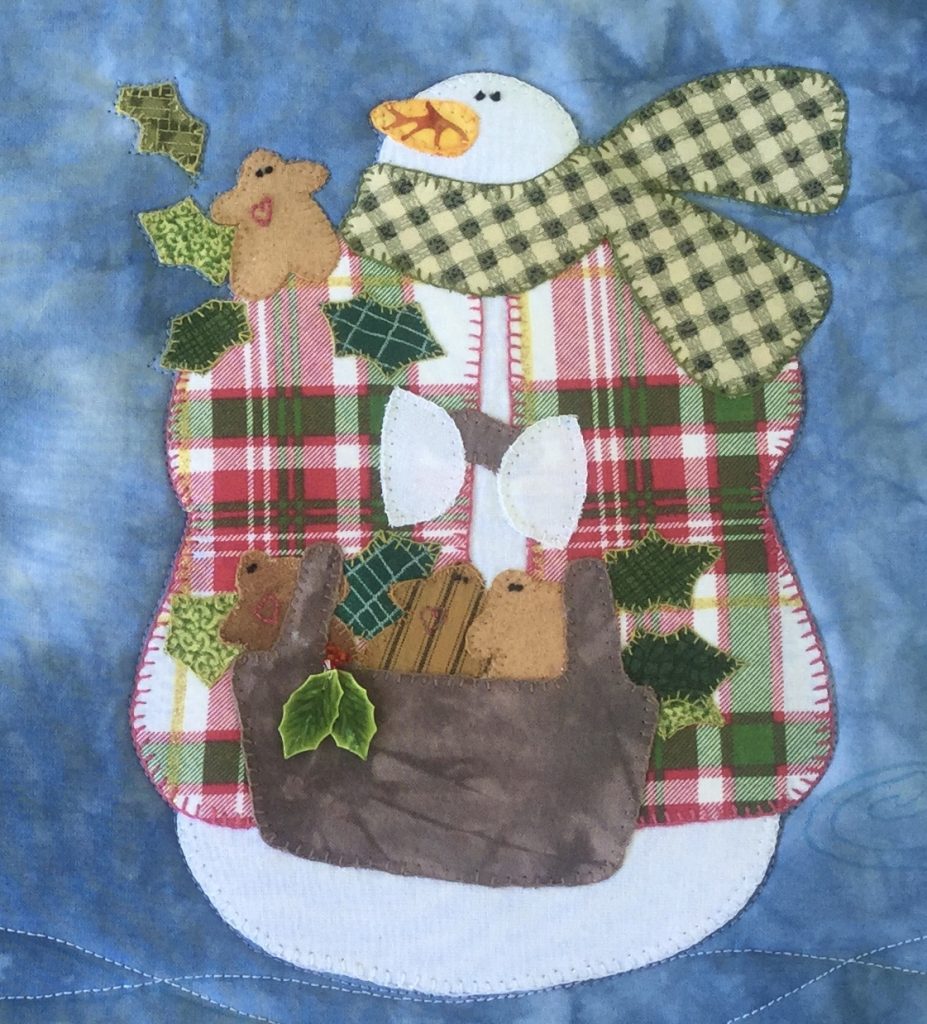
Choosing the Snowman from Nancy Halvorsen’s ‘The Night Before Christmas’ book, I set about constructing him onto Teflon type cooking paper, so I could line him up perfectly, before adding him to the backing fabric. Once this was done, I put him in place and ironed him down, and stitched him on by hand. Small stitches in blending colours using embroidery cottons was the way to go. There really is something soothing about stabbing fabric over and over, and making something of beauty at the end.
After completion of the snowman, I freehand drew a whimsical tree, made it into a pattern and then set about dyeing the fabric needed. I wanted the rolling, soft shapes that I can achieve with ice, and so I went to work, using various shades of greens, and made sure I left a few places without colour, to create the negative spaces, which became my ‘snow’ on my tree.
Once again, I used my Teflon baking paper, assembled the pattern pieces cut from my fabric and made the tree, offering the compositional piece movement, as we know that snowmen don’t move… not while you look at them anyway. ;). Having hand stitched this down, it came time to sandwich it together. I used the outline of my tree and the snowman to cut the shapes out of batting, and used spray adhesive to attach them to the reverse side, allowing it to line up inside the stitching on the back, then cut a larger piece of batting and spray basted the whole front to this and applied to the back fabric. My piece was ready to quilt!
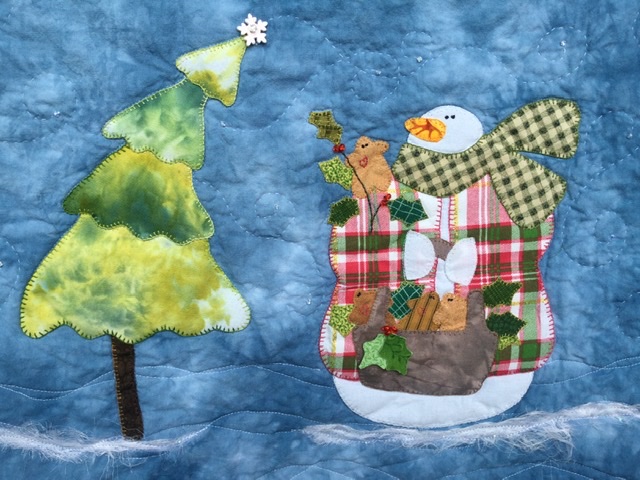
I basted the outside edges together to prevent the sides from separating, and then simply stitched using machine, around both the tree, and the snowman. Having the extra batting behind both images made them ‘pop’ up from the fabric, giving them a little bit of life and movement. I criss-crossed along the bottom of the quilt with wavy lines and created the ‘ground’, and then came the idea to create swirling snow. I have never, in my 50+ years of life, seen snow fall!!! So I began by using a blue water soluble marker, drew lines of slow long scrolls. Julie was very encouraging that I COULD hand quilt, as it’s something I’ve never done before, and well, quite frankly was terrified of! But.. grabbing the cotton reel by the short and curlies, I got to threading that tiny needle, watched a YouTube tutorial, and began! Quite frankly.. after I had finished them all, I was HOOKED! (I even added another swirl just because!) And then I was finished! Binding completed, I then stood back and looked at what needed to be done.
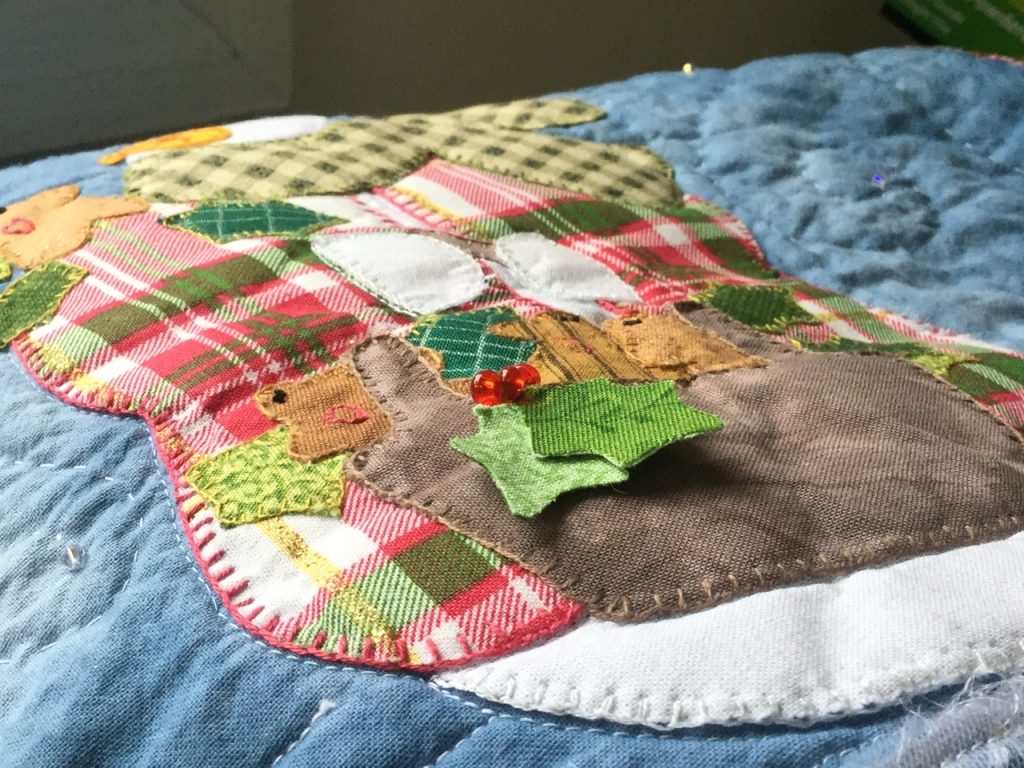
Life is not complete without some form of Bling! And there is no better bling than Swarovski! I love it, and so for every curling swirl, I added a bead for the snowflake. Glass beads for the berries of the holly, and a wooden snowflake with Swarovski for the top of the tree, but it definitely still didn’t look ‘grounded’. I had a bit of loosely woven craft silk, so I pulled and shredded this, and lay a small piece of tulle across it, and laid it on the ground beneath the snowman and the tree.
So now he’s done and I will have to find another project to work on. Luckily I never run out of ideas. However, it would help if I could just shut the gate on my wondering mind for a moment, while I pinned one down! What holiday projects are you working on? Are you running out of time? It’s beginning to look a lot like…. Christmas!
